Needs of Artificial Light to Indoor Plants
Light is the most crucial considering growing plants. They require it to produce sugars to maintain their lives. The majority of houses do not have appropriate natural light to grow plants. Tropical plants and African violets which require less light are normally the only ones that succeed. When the light strength is less and there are more cloudy days, even they have a hard time in the winter season. The finest option is to offer artificial light. Incandescent bulbs are not useful to plants.
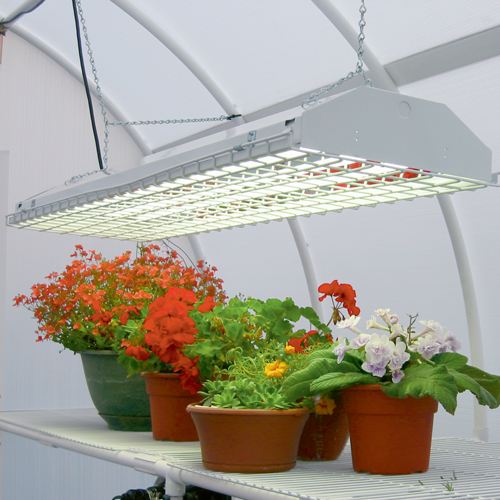
They produce too much heat and do not provide the needed light spectrum for plants. There is no need for pricey grow lights unless you want them. Routine fluorescent light can offer the correct spectrum and strength. The general guideline is plants that need full sun ought to be no more than 4" from televisions and because the strength of light is more powerful at the center of televisions, they ought to be in the center. I have my lights on adjustable chains so I can raise and decrease them according to the need and growth of the plants. The lights ought to be left on 16 hours a day. A timer can be purchased so you do not need to be around to turn them on and off.
Banks of easy work the very best. I have mine in groups with the reflectors touching each other.This enhances the quantity of light listed below the lights. Double tube fixtures that are 48" long are the best and are typically offered as shop lights.
The lights can be higher for plants that don't require complete sun to grow. Experimenting has to be done to find the right height. Do they look bleached out and not putting out brand-new development? Probably they are too near to the lights. Are the stems getting unnaturally long, the leaves look somewhat yellow and the plant appears to be stretching to the light? The lights need to be better.
OK, so now where do you put the light set up? I have a certain stand which was developed for this purpose. It is made from 3 tiers of full sheets of ply wood and I have growing space on 2 of them. The lights are screwed into the tier above and on adjustable chains. I reside in an apartment and reorganized the entire house to accommodate this. Don't have that sort of room? I didn't initially either and this is exactly what I did. Every area where lights can be hung required to be checked out. Underneath cabinets, book racks, tables, small stands constructed to accommodate lights and growing locations, or industrial establish if you can afford them.
I have a wood, dining space size table that worked as my very first light set up. I simply screwed the lights into the underside of the table. I had the ability to get 6 sets of lights under it. It might supply light for 6 trays of seedlings. I had much more than that, so I would turn them under the lights. Take one or two out, put the others because have not had light for a day or 2. I would choose which end was the last plant tray to be under the lights. During watering, I would eliminate that last tray and while watering, move the others up to that spot which made an opening on the other end for a tray that didn't have adequate light. This made it so plants had about 5 days of light and one "cloudy day" with little or no light. Don't let them go more than a number of days without light or it will set them back excessive.
You can also give one set of trays light for 12 hours and swap them out with an equivalent number of trays so they can experience 12 hours of light. Occasionally, work it so that each group gets 16 hours of light. Issues with under a table consist mainly of eating at the table ran out the question. Likewise, this was an old table and nobody cared if there were holes drilled in it. If you can't do this since of objections from the partner or roommates about not being able to consume at the table, or damaging the table, explore other methods of doing this. As I said formerly, lights can be put under cabinets, racks, or the racks of book cases.
A way to save area under the lights, specifically throughout propagation, is to start the seeds or cuttings in community pots. I prefer to utilize 3 oz plastic solo cups and drill drainage holes in the bottom. I will make use of tomatoes as the example, but this can be finished with any plant. I typically sow 10-12 seeds per pot. When they grow to the point where they are competing for light and space, I transplant them in groups of no greater than 4 to new neighborhood pots, usually the 3 oz solo cups. Just do the following with tomatoes, you can plant tomatoes deeper than they were previously growing.
They will grow roots along the buried stem. Not all plants will do this so only do it with tomatoes. This keeps them brief so it is much easier to keep them under the lights. Again, when they out grow this plan, they go into different pots or new solo cups. In this way, you save area for longer. They compete at an earlier age and are bad growers if you begin out with too lots of seeds in the cup. It is extremely important making sure they are watered and fed frequently. I examine each pot individually twice a day and water only if it is dry. If it's damp, I wait until the next check and if it is dry, then the plant is watered. Watering them separately, though more work, indicates that none are over watered ... many times responsible for more failures than under watering.
I hope this article offered you concepts how to bring more plants into your home. Plants add atmosphere as well as help to recycle the air in a house and being surrounded by green in the winter actually assists the soul.